Tooling construction technology and production of decorative wood standard |
|
| Author:China Oriental Huaao Office Furniture | |
| Date:2014-5-9 18:05:34 | |
One , all wood joinery check :
1, wood moisture content = 12% ( glue pieces of wood to fight moisture content 8-10%):
2, the degree of survival = denim twill timber length / horizontal length X100% = 20%;
3, shall not be used or still worm-eaten rotten wood ;
4, the appearance of articulated timber diameter = 1 /5 width or thickness of material , and the maximum diameter = 5mm;
5, the appearance of the materials used shall not have died Festival , Poles and cracks ;
6, the internal diameter of the section with live material = 1 / 4 sheet thickness or width , and the maximum diameter = 20mm;
7, with the inner member material is not greater than the length of the crack length: through- crack 10% , a non-through crack 15%;
8, internal material wane local thickness = 1 /4 sheet thickness , width = 1 /5 sheet width ;
9, finishing parts or items shall not have parts with resin capsule ;
10, should be a single , material stability, texture similar symmetry ;
11, the same piece of gum trees fight , texture should be similar ;
12, package paneled pieces with strips should be possible to use the texture should be similar species ;
13, buried parts should be required to be embalmed , joinery should brush immediately after moisture into nails again.
14, joinery should adopt mortise plus glue connection method. Fire safety requirements of fine wood fire treatment works must be done according to the provisions .
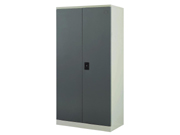
Two , closet , cabinet and fixed furniture installation
1. Process
Looking for line positioning → box, rack-mount → cabinets, partitions, install → fulcrum wall ( hanging ) cabinet fan installation ? Hardware Installation
2. Looking for line positioning : Before plastering the indoor uniform elevation line, according to the design requirements of the construction plans cabinets, wall cabinets and the upper and lower elevation mouth . Height, considering the relationship between the thickness of the plaster to determine the appropriate position.
3. Box, rack installation: cabinets, wall cabinet frame and frame should be conducted before the interior plaster , installed in the correct position , on both sides of each box nailed two nails fixtures and wall tiles nailed wood , nail caps shall exposed. If the partition walls of aerated concrete or lightweight partitions, constructed according to the design requirements fixed . If the design can be pre- drilled holes without requirements Ф5mm deep 70-100mm, and embedded in the hole prior wedge , 107 glue stick mud , firmly bonded into the hole before mounting cabinet . When using steel cabinet , to be in a position to install the hole fixed frame embedded iron , solid -weld the frame pieces . In the box, rack fixed , should be corrected , set square , hanging straight , check the elevation, size, position accuracy then fixed .
4. Closet partition pivot mounting: Fulcrum clapboard structure according to construction plans and elevation position required install partitions fulcrum ( frame ) . Wood clapboard fulcrum , the fulcrum is generally wood nailed to wooden wall tiles, concrete bulkhead is generally [ -shaped pieces of iron or steel bracket set .
5. ( Hanging ) cabinet fan installation :
1) fan mounting location is determined by hardware models , cutting off the mouth of the direction of the fan , the general direction should be to open the mouth right fan for the fan cover .
2) Check the box port size : Box catchy opening height shall be measured at both ends ; box width of the mouth should be on between both sides of the box , in the next three points, and the point in the corresponding parts of the fan crossed .
3) be crossed for the first time according to box fan repair planing to make boxes , fan left seam appropriate test equipment and draw a second line repair planing , while draw boxes , fan hinge slot position , note crossed when away down onto the scene .
4) shovel , tick hinge slots installed hinge : hinge location marked according to plan , with the flat shovel carved hinge edge , you can tick the hinge slot.
5) Installation: Installation should be pressed into the fan will hinge hinge slot alignment screws tighten good repair test equipment when the hinge groove depth , etc., a good tune box fan gap on each frame tighten a screw hinge first branch , and then closed, check the box and fan formation, no defects, will meet the requirements of the placement of all screws and tighten . When wood screws should be driven into the length of 1 / 3 , screwed into 2/3, such as boxes , fan of yellow Jacaranda or other hardwood , hinge mounting screws should be designated drill bit , a pore size of 0.9 times the diameter of the wood screws , eye deep screw 2 / 3 length.
6) When installing open fan : first frame , a good amount of fan size , determine counterpart middle seam , cut mouth depth, conducted after gouging crossed suitable test equipment , the first load left fan , installed after the fan cover .
7) Hardware Installation: Hardware varieties, specifications, quantities according to the design requirements of the installation , select the installation position of attention , when there is no specific size operations carried on by the technical tests , the general should be installed templates, confirmed after a large area of installation
6. Product protection .
1 wood products entering a timely brush bottoms , walls should brush preservatives ; steel products should brush the rust , warehousing storage.
2. Install cabinets, wall cabinets when prohibited hit altercation plastering and other decorative surfaces to prevent damage to the finished surface.
3. Installed closet partition not dismantled, to protect the product integrity.
7. Should pay attention to quality issues .
1 box uneven plaster surface , resulting in cheek plates, batten uneven : mainly because the box is not perpendicular to the surface layer of plaster surface roughness is not inconsistent or vertical . .
2 cabinet frame installation is not strong : touch activities embedded wood tile installation , less a fixed point , with nails , the quantity to be enough to firmly buried wooden bricks .
3 hinge uneven, loose screws , nuts are uneven , missing screws : the main reason hinge slot shades when installing screws into too long. When operating the screw into the length of 1 / 3 , screwed into the depth should be 2/3 , not tilted .
4. Cabinet frame and hole size error is too large, resulting in border and side walls, the gap between the top and the frame is too large , the size of the hole left when the note structure construction, and strict checks to ensure that the hole size.
Three , ceiling decoration process engineering
Suspended ceiling decoration process
( A ) suspended ceiling structure generally consists of three parts: the boom , the skeleton , the surface layer .
( B) of the suspended ceiling construction technology
(1) Qingdao Steel keel , aluminum keel ceiling : elastic line installation boom → → → install panels installed dragon skeleton
(2) PVC plastic board ceiling : the main beam elastic line → Install → Install → Install plastic sheeting dragon skeleton .
( C) construction elements
Should first pop elevation line the walls, fixed at both ends of the wall pressure lines, fixed firmly to the wall with concrete nails . According to the design elevation , along the walls around the elastic line as a standard line of ceiling mounted , the level of tolerance of ± 5 mm. Case of caisson ceiling , should be fixed layering, layering Yang angle connection . Note that aside exit lighting lines. Large ceiling area , should be laying the keel in the middle. Hanging point spacing should retest generally not Exalted ceiling from 1200 to 1500 mm , the Master ceiling of 900 to 1200 mm. After installing the front panel mounting respond keel plates and panels to check compliance with the requirements before installation.
( Four ) grille ceiling construction process
1. Accurately measure the keel finishing → → → Open semi- groove surface planed lap → → install frosted glass flame brushing
2. Construction points
Wood grill skeleton production should accurately measure the size of the roof .
Keel should be finishing, surface polishing, interface open bar, horizontal, vertical keel junction should be slotted lap, brushing should be flame retardant treatment .
( Five ) caisson ceiling construction process
1. Construction points
(1) wood keel installation requirements
① Material : Wood sought assurances that no splitting , corrosion, insects frogs, dead knots and other defects ; specifications for the section of length 30 to 40 mm, width of 40 to 50 mm . Moisture content below 10% .
② design: caisson -style ceiling , if the height is greater than 300 mm should be used hierarchical ladder layer processing . Keel structure must be strong , large keel spacing not greater than 500 mm . Must be firmly fixed to the keel . Keel skeleton at the top , the wall must have a fixed piece .
③ Construction : Ceiling standard deviation of not more than 5 mm high-level wooden keel should be planed Calibrating the underside unanimously section thickness , and should be fire-retardant treatment .
(2) wood keel installation specifications :
Should first pop elevation line, the position of the line shape , hanging point distribution lines and lighting installation position line . Dragon skeleton hanging point is fixed at the top , there are two ways: one is with a diameter of 5 mm above the nail directly to the angle iron or flat iron is fixed at the top. Another drill is at the top , with the expansion bolt iron or wooden doing hanging point . Lifting point should guarantee a solid and safe. Wooden dragon skeleton installation, quality inspection and acceptance should be , in order to carry out the installation of decorative panels .
(3) decorative panel installation Kind
ceiling decorative panels are mainly plasterboard and wood panels into two categories , require board formation, no bump, no fracture , tidy corner . Installation of decorative panels are mainly two nails and wood screws fixation method , which is mainly used round nailing wood veneer installation, construction speed ; wood screw fixation is mainly used for decorative panels of gypsum board to improve the ability to execute the nail plate . Ann decorative wall panels should be fully consistent with decorative moldings can leave gaps between the joints should be closely decorative panels . Ann decorative ceiling panels should be set aside when the lights port position . Decorative panels installed , the need for finishing the job finishes , materials commonly used in paint and wallpaper , with its construction of the wall construction methods .
Four door ( window ) set construction process :
1, attached to the primary treatment :
① Door decoration is the so-called grass-roots structure attached to the wall . Door in the production , the structure of the wall must first nutation angle loft dressing according to design requirements and approval level with cement mortar .
② such as partition walls of steel plate by Parker quality titanium walls, cypress because titanium plate material itself can not be fixed by weight or other objects shall assemble the light when the door position on both sides of the wall space with angle iron reserved 10CM and day surface , ground fixed and modeling, mold filling in charge of cement mortar, cement mortar to be wet with water and dried thoroughly before making conservation door ;
2, Door
1, Door to find when making a horizontal line , determine the size of the door.
① on grass plain solid structure , with a hydraulic drill press 10CM pitch punching a hole into the wedge in the fight ; punch to both sides of the vertical line to Door , do not destroy the original wall .
② wood panels fixed to the bottom of the door should be careful to check the diagonal , vertical lines are in a plane, according to the design requirements of the 9MM MDF cut to the required width has a large head with a nail to secure the wedge ; may put MDF Poucheng two , leaving the middle of the empty seam 5MM anti anti-deformation, then brush on . . . . Gun nails in the wood panel , choose the flooring nails nail thread , both sides do not leave gaps , fixed 9MM board, to put the line , is not it horizontally or vertically
③ plus shank nails with white latex fashion and decorative wood veneer pasted lines ; Door and door gap
④ is: top 2MM, both sides of the 2.5-3MM, the bedroom door below ( ground clearance and decorative materials ) for the 5-8MM, beneath the bathroom door for the 8-12MM.
3, Chuangtao Production methods
① Door window cover basic and same, only with marble window sills when required , to produce marble window cover must first be fixed and fully dry after ;
② In order to ensure beautiful, marble windowsill best small bevel grinding and marble must be flush with the lower vertical ;
③ any special design requirements must first make Chuangtao of marble with glass, plastic and structural wall fixed , fixed with cement mortar so as to avoid distortion caused by timber .
4, technical points :
① with the original structure of the wall must be sufficiently closely firmly attached , so should the door open door leading to frequent loose ;
② door junction with the ground to set aside the Land of the decorative material position ;
③ horizontal, vertical door ( window ) decorative wood line when the handover should be playing 45 -degree angled stitching, press the color or texture of the seam.
Five , cabinet construction process :
1, plate : according to the design requirements of a small core board to 5mm , 15mm Daixinban be cutting, according to the position of cabinet structure for single-sided or double-sided Daixinban 15mm , 5mm plate on one side to the Baoli board white latex paste , and placed in a flat bench press , heavy pressure ;
2, Assembly: natural drying or heating more than seven days , to be fully dry when the plane did not glue the floor , according to the design requirements of the board off 2.1CM 15mm slot, press the slot position on the cabinet frame is assembled ; cabinet body shall incorporate drawers , drawer accessories must first be installed ; assembled, will lead 5mm plate with nails connected with the cabinet ; Meanwhile according to design requirements drawer compartment panels ;
3, Fixed : After the first part of the cabinet skirting produced according to the design described above is completed, the auxiliary plate fixed to the ground , the assembled cabinet placed on the skirting frame with straight nails with oblique playing the way the cabinet frame and skirting fixed , according to the design requirements and the size of the cabinet interior actual height above the surface of the baffle and the day , the cabinet fixed ;
4, molding : The cabinet is fixed , there is , then white latex plus shank nails way veneer , solid wood cabinet lines and pasted shut ; and to be fully dry before installing plastic door hinges , drawer loading doors installed , compartment panels ;
5, technical points : When
① bonding decorative panels, only use pattern nail plate and are subject to protection . After the glue dries , will start off guard , so to avoid eye because of beautiful nails on impact ;
② good drawer bit reserved and ensure a smooth installation of drawer slides , drawer slides smoothly ;
③ consider a good curved arc shape structure and interface with other parts of the cabinet handle '
④ must be glued back after a good knot to connect with Polly board and cabinet 5mm plate , or prone middle hollowing phenomenon ; When
⑤ fixed cabinet , can not remain on the horizontal or vertical junction shall Daixinban with broken 15mm or 5mm small Xinban filling so smooth vertical and horizontal cabinet to keep the state in order to avoid the cabinet frame deformation due to non-horizontal resulting in an aggregate installed door lax ; When
⑥ making cabinets, decorative panels shall copied oil paint 1-2 times , so as not to affect the appearance of stained veneer ; When
⑦ frame lines shut , must first fight will be 450 docking ramp ;
⑧ doors off the vertical direction must be the same texture for decorative panel color , adjacent doors shall be of the same color ;
⑨ fire board made decorative panels , you can only use immediately have to do adhesives ;
⑩ sunny construction shall be adopted immediately and evenly board shall enter two when doing the adhesive paste , let it dry and then be attached to the sticky ; paste , and must be aligned with a thin wood board push forward direction so that no air bubbles full veneer pasted .
Six posts face plate and batten installation and construction process :
( A ) material
1, wooden doors and posts the face plate and batten , door frames should be the same species of wood moisture content is not more than 12% , without cracks , distortion, dead knots and other defects.
2, wooden doors and cheek plates, cheek plates pier and batten processing , according to the design requirements of the specifications and lines of conduct .
3, round nails .
( B) operating conditions
1, before the cheek plates and batten doors and windows should be installed and prosecutors installation location is correct . Before
2, installed cheek plates and batten installation site should be finished wiping the surface layer of ash or decoration .
3, the installation should be done before the ground cheek plates and batten .
( C) of the operating process
1, check the cheek plates and batten installation parts plaster seams and door frames flatness .
2, depending on the location cheek plates and batten , preparation cheek plates and batten lengths and connectors, cut the corner to take the slope angle of 45 to face contact . After the pre-installed so should the other cheek cover plaster surface layer, cover the face width of not less than one board and batten 10MM.
3, nailed cheek plates and batten should be tightly nailed to the door frame , nail caps should flatten into the pitch as the nail plate and cheek batten species , material, section size and , generally is 400MM.
( Four ) product protection When
1, installed cheek plates and batten may not hit the door frame .
2, installed cheek plates and batten should have been done to protect the project , so as not to damage , clean .
Seven , wooden doors and windows construction process :
1, plywood hollow doors :
① The 18MM white latex wood panels plus a double-sided fixed peg way , the decorative panels with white latex plus peg -sided way closed ( subject to nailing the decorative panel Stickers bottom panel sentenced wooden bar protection ) ;
② Initial production is completed , the leaf level of the embryo into a dry ground or bench press , weight evenly on the set , so that in a dry state under a fixed pressure ventilation over four days ; After
③ embryos to be fully dry leaf shape, start off the panel to protect the wood , and then repair clear edge , and white latex plus shank nails ways paste wood doors side edge ;
④ front doors decorated by the design of the processing ;
⑤ hollow plywood door standard thickness of 4.0cm, which: wood keel thick 3.4cm, double decorative panels Total 0.6cm.
3, plywood bump door :
① according to the design plan will cut wood panels molded white latex plus shank nails fixed manner, the decorative panels with white latex plus shank nails the way closed ( playing time posts in decorative panels decorative panels nailed wooden bar at the bottom with protection ) , decorative panels are required to be cut design styles , protruding parts of vertical wood texture a whole dominated ;
② embryos placed in the leaf level of a dry ground or bench press , weight evenly on the set , so that in a dry state under a fixed pressure ventilation over four days ; After
③ embryos to be fully dry leaf shape, start off the panel to protect the wood , and then repair clear edge , and white latex plus shank nails ways paste wood doors side edge ;
④ standard door thickness of plywood bump 4.6cm, where: wooden keel thick 2.2cm, double-sided sheet total 9mm 1.8cm, double decorative panels Total 0.6cm.
1, wooden frame glass door :
① using wood panels open 8-12CM wide wooden keel produced according to the design plan , the decorative panels with white latex plus peg -sided way closed ( subject to nailing the decorative panel Stickers bottom panel sentenced wooden bar protection ) ;
② side by design solid wood frame lines playing deed mouth with white latex plus shank nails fixed , the other wood temporarily not fixed by the design of the production is completed , set in the frame ;
③ embryos placed in the leaf level of a dry ground or pressure stage, the home uniform weight , more than allowed under state pressure ventilation drying fixed four days ; After
④ embryos to be fully dry leaf shape, start off the protective wood veneer , and then repair the Qing side , the double solid lines placed in the glass , and white latex plus shank nails way pasting solid wood edge side doors fixed clip glass lines ;
⑤ plywood Bump standard thickness 4CM, where: wooden keel thick 3.4CM, double-sided decorative panel Total 0.6CM.
4, wardrobes ( bookcase ) Doors :
① closet door with a small core board to do grassroots 15MM board ;
② grassroots force plate by 25CM open slot spacing , put force accounted for grassroots plate groove depth of 1/ 3 , respectively, in the primary plate affixed to both sides of Bao board , decorative panels ; using only white latex paste Baoli board when not nailing , decorative panels can be pasted shank nails with white latex way ; After
③ decking basic paste is completed, the leaf level of the embryo into a dry ground or bench press , weight evenly on the set , so that the base in a dry state fixed ventilation pressure than four days ; After
④ embryos to be fully dry leaf shape, start off the protective strips of wood veneer and white latex plus shank nails ways paste wood doors side edge ;
⑤ standard door thickness of 2.1CM, construction methods plywood bookcase door above, construction methods basically the same glass bookcase door glass doors, glass -sided wood still using fixed lines , but the lines are only making decorative wood surface .
5, shaped ( curved ) Doors : Production methods
shaped ( arc ) of the basic door above, but subject to the design requirements or cabinet radian first production module , and then the middle shelf (15MM board ) single-sided double-sided decorative panel after sawing grooves and intermediate shelves on the module , wait until after fully dried , and then the other processes ;
6, technical points : When
① making dragon skeleton , to ensure smooth vertical and horizontal , the corners are right angles into 900 ;
② doors embryos during the drying process is subject to the force balance and dry thoroughly ; basic carpentry after construction is completed , the fan level shall be placed in dry and ventilated area, so as to avoid placing the wrong way cause deformation warped ; < / P>
③ attention paste veneer nail gun to use, only use grain nails , straight nails can not be used , so as to avoid excessive nail heads doing too obvious traces of paint putty aesthetic impact ; When
④ clear edge sealing paste wood lines, played gum and pay attention to when you can not hurt the decorative trim panels ;
⑤ as decorative panels for the fire board , fire board shall use double-sided finishes, and use glue to paste can not immediately get to the nail .


-S.jpg)